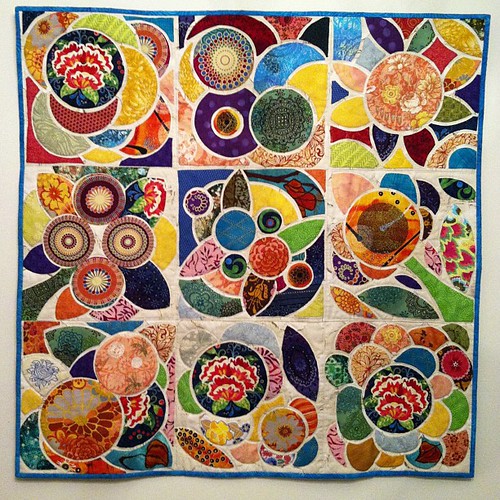
Lotus Tile Quilt Completed!
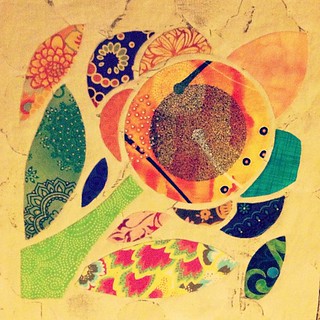
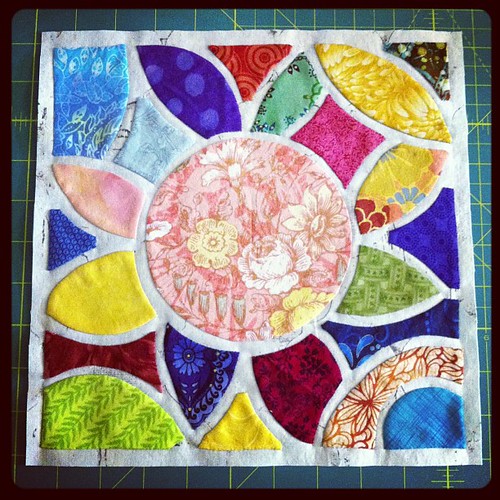
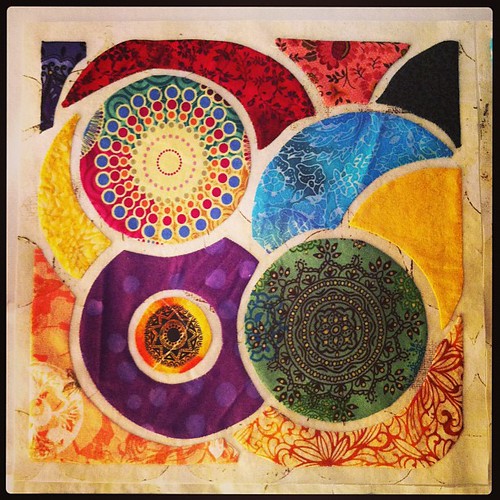
Remember this quilt?
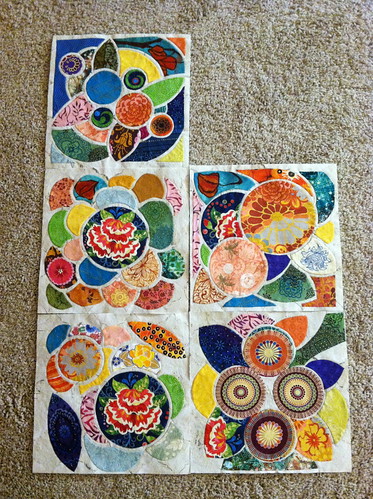
I pushed myself really hard to finish the other four blocks in July/August.
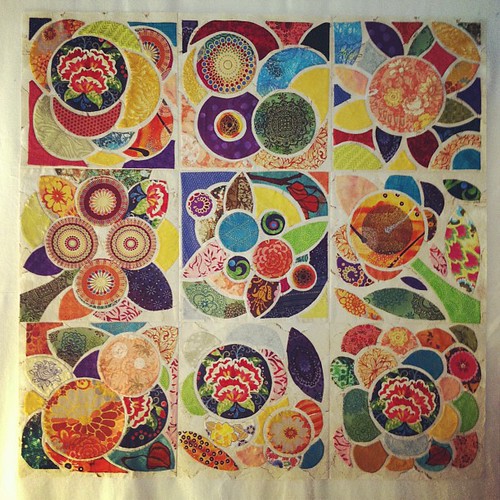
I worked really hard to get it done and at times, I was really sick of working on it. Strangely, now that it is done, I sort of miss having an applique project to work on.
There were many times that things did not go well with this quilt. I used needle turn applique on most of the blocks but the pieces shifted a lot from where I originally pinned them, even though I was very careful about how I pinned. I wanted to switch to starch and freezer paper on the last couple of blocks to see if this problem could be solved and was not happy with the result (frayed corners). So I guess I will go back to needle turn applique in the future or maybe starch and plastic templates. I also messed up trimming down some of the blocks and then the pieces were not evenly spaced from the edge of the block. I had to fudge some seams to make it look better. At one point, I was so mad about the imperfections and the time I put into this quilt that I thought about throwing the top in the trash. I definitely have problems with perfectionism and overreacting but I think there is simply something frustrating about putting hours of work into a project and then have it not turn out the way you thought it would. The final problem: I tried a poly batting and hand quilting. It seemed way too puffy. I ripped everything out, switched to cotton batting, and machine quilted it. Much better.
Lessons learned:
I pushed myself really hard to finish the other four blocks in July/August.
I worked really hard to get it done and at times, I was really sick of working on it. Strangely, now that it is done, I sort of miss having an applique project to work on.
There were many times that things did not go well with this quilt. I used needle turn applique on most of the blocks but the pieces shifted a lot from where I originally pinned them, even though I was very careful about how I pinned. I wanted to switch to starch and freezer paper on the last couple of blocks to see if this problem could be solved and was not happy with the result (frayed corners). So I guess I will go back to needle turn applique in the future or maybe starch and plastic templates. I also messed up trimming down some of the blocks and then the pieces were not evenly spaced from the edge of the block. I had to fudge some seams to make it look better. At one point, I was so mad about the imperfections and the time I put into this quilt that I thought about throwing the top in the trash. I definitely have problems with perfectionism and overreacting but I think there is simply something frustrating about putting hours of work into a project and then have it not turn out the way you thought it would. The final problem: I tried a poly batting and hand quilting. It seemed way too puffy. I ripped everything out, switched to cotton batting, and machine quilted it. Much better.
Lessons learned:
- be more careful about trimming down blocks after the applique is complete and be sure the design is really, truly centered before cutting!
- even if the quilting doesn't look that great in one area, once you get the whole thing quilted, it will look fine.
- don't attach the hanging sleeve so low on the backing--it needs to be right under the stitching line from the binding so it hangs flat against the wall. (at some point, I will restitch the hanging sleeve but not right now!)


Comments